Facebook & Instagram Lead Ads Integration
Connect your Facebook and Instagram Lead Ads directly to Lucep. Ensure every social media lead is called back within 60 seconds.

Prerequisites
Before starting, ensure you have Admin privileges for both the organization's Lucep account and the Facebook account.
If you do not have these privileges, please involve the system administrator.
Integration Steps

Login to Dashboard
Use this link to log in to the web app using your credentials:
lucep.com/app/facebook/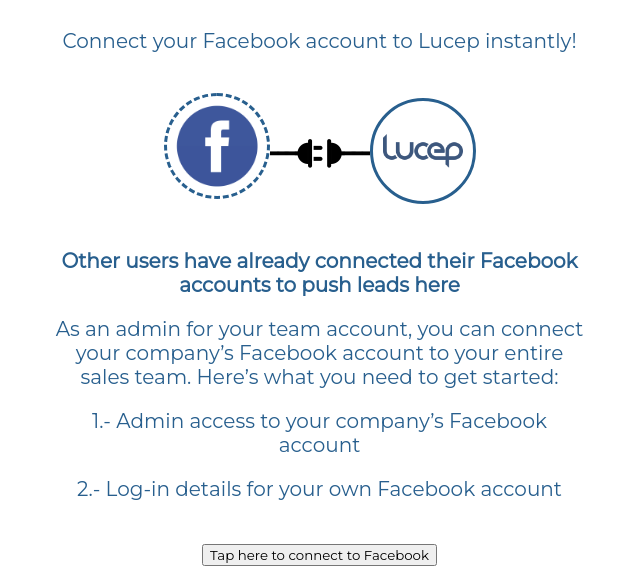
Connect to Facebook
Click on the Facebook menu in the left sidebar navigation, then click on the button labeled "Tap here to connect to Facebook".
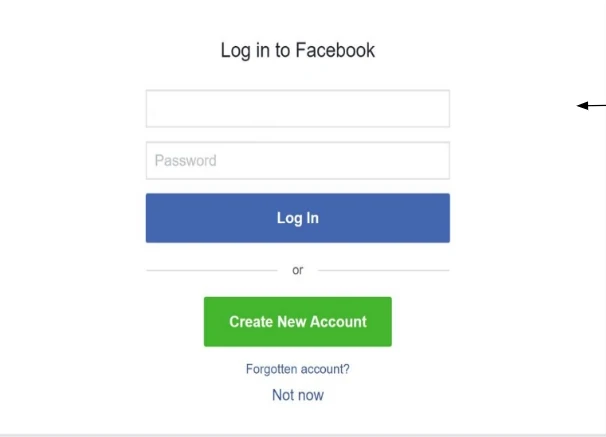
Facebook Login
A secure popup will appear. Log into your organization's Facebook account using the admin credentials.
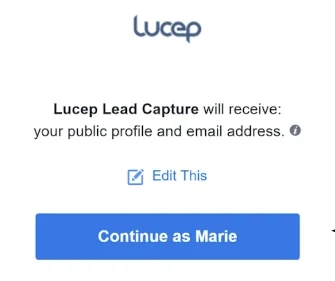
Authorize Access
Click on "Continue as [your profile name]" to confirm and grant Lucep the necessary permissions to capture leads.
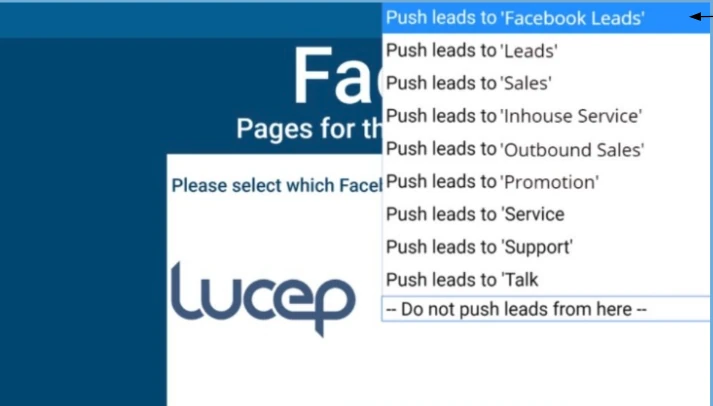
Select Category
Use the provided dropdown menu to map the routing. Choose "Facebook leads" and click the Next button.
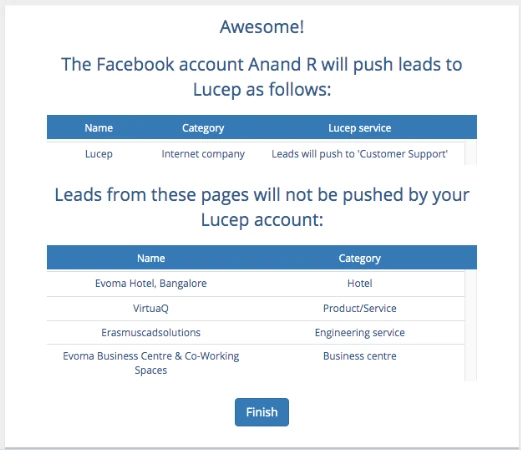
Review & Finish
Review the summary of pages that will push leads vs those that will not. Click on Finish to complete the process.
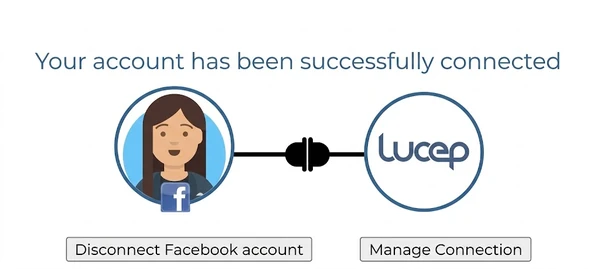
Connection Complete
Congratulations! Your Facebook account is now linked to your Lucep account. You can manage the connection or disconnect it at any time from the dashboard.
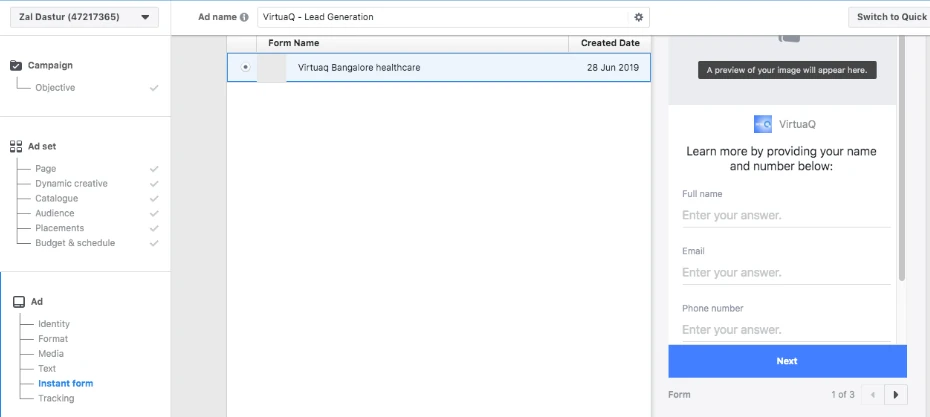
Facebook campaign Setup
When setting up a campaign to get instant notification on the Lucep App make sure to create a Lead Form.
- - The basic form with name, email and phone number fields is provided by default.
- - Lead form is completely customisable where you can change header text and add additional fields
- - The fields which are required for Lucep app are already available as default in FB
Testing a Lead Ad
Once connected, ensure your Facebook Lead Form is created with at least name, email, and phone number. Then, verify the data pipeline:
Visit Testing Tool
Go to the Facebook Developer tools at Lead Ads Testing Tool and select your page/form.
Create & Submit Lead
Click on "Create lead", fill out the generated form with test data (Name, Phone, City), and click Submit.
Review in Lucep App
Open the Lucep App on your device. The lead should be pushed instantly, ready for you to claim and review contact information.
FAQs & Troubleshooting
Challenge:
After completion of the steps above, no form is seen in the Lucep Dashboard.
Troubleshooting Tip 1
Check your Facebook and Lucep Admin permissions, and verify whether the page in question is explicitly allowed under “Edit settings”.
- Go to Meta Business settings.
- Navigate to Integrations > Leads Access.
- Click on "Edit settings".
- Ensure the page you are looking for is checked. If not, check it and save.
- Refresh your Lucep dashboard to see if the page is now visible.
Troubleshooting Tip 2
Try adding another user with Admin permissions for both Facebook and Lucep, and connect the Facebook page using the new Lucep user account to rule out token or individual permission issues.
Ready to Transform Your Sales Process?
Connect with our experts to see how Lucep can help you qualify leads faster and close more deals.